
Statues are a cornerstone of Idleon and you start grinding them straight from the first map. With the addition of Onyx Statues, there’s all the more reason to keep farming more statues to give huge boosts to all your characters.
With the more recent addition of the Hole in World 5 and with it, the Dragon Warrior Statue which boosts all your other statues bonuses, these boosts have become even more significant.

How Statues work and how to get Onyx Statues
The Statue is a pinnacle of the World 1 town and it’s one of the first sources for bonuses you unlock by giving him the Sculpting Tools from the Town Shop.
Then all you need to do is keep killing monsters to get statues and deposit them to the statue man to get bonuses. Simple.
Initially all statues are character specific, so when you deposit statues on one character, only that one will gain the bonuses.
However, once you reach second world, you can buy Guilding Tools from the World 2 Town Shop. Once you drop those on the statue, it will turn golden and give an Upgrade Tab to the statue from which you can pay coins to make the statues account-wide. This is crucial so all your characters will share your statue bonuses and progression.


The most important upgrade comes from the Monolith NPC in the World 4 – Flamboyant Bayou map, as completing his second quest will reward you with Onyx Tools. Check our World 4 Quest guide to see how to complete that quest! You only need to complete the quest on one character to gain the Onyx statue boosts account wide.
Once you drop those tools on the statue, you will gain the ability to drop a stack of 20,000 of any statue on the statue man to turn that specific statue into its Onyx variant. This will DOUBLE the bonus of that statue and each Onyx statue you have will give a +10% boost to any statues deposited.
Getting all Onyx Statues is the main reason why you need to farm a lot of statues, which is the main reason this guide exists.
Important Note on Onyx Statues
Make sure to DROP the 20K statue stack from your inventory onto the Statue Man in World 1, DO NOT DEPOSIT THEM like you normally would!
If you deposit the stack in the statue UI, the statue will not turn into Onyx.
Also note that you can only drop the 20K stack to create an Onyx statue on a character that has completed the Monolith Quest mentioned above, even if the bonuses are shared by all!
All Statues explained & Where to find them
Now we get to the important part, which is where to find all these elusive statues. The table below showcases the best farming locations for each statue, but most statues have multiple sources to get them from.
The Effect-Column in the table shows the base level of the bonuses you gain per level, but these will be doubled once you get the Onyx version of the statue and further boosted by other means explained later in the guide.
Most statues are best farmed with a Divine Knight with a Crystal Mob build showcased later, so we added the optimal maps below the sources. For statues you get mainly from normal mobs, Elemental Sorcerer tends to be the most efficient, but for those you can also use Time Candies.
| Statue | Effect | Main Farming Source |
|---|---|---|
Power Statue | More Base Damage (+3 per level) | Crystal Carrot (W1 – Valley of the Beans) |
Speed Statue | +% Movement Speed (+0.1% per level) | Crystal Carrot (W1 – Valley of the Beans) |
Mining Statue | More Mining Power (+0.3 per level) | Chopping (Any tree in W1) Crystal Carrot (W1 – Valley of the Beans) |
Feasty Statue | +% Food Effect (+1% per level) | Crystal Carrot (W1 – Valley of the Beans) |
Health Statue | More Base HP (+3 per level) | Crystal Carrot (W1 – Valley of the Beans) |
Kachow Statue | +% Crit Damage (+0.4% per level) | 10K per character from Monolith’s 3rd Quest (W4 – Flamboyant Bayou) 100 per character from Royal Worm’s 1st Quest (W4 – Wurm Highway)  50 per character from Tiki Chief’s 1st Quest (W1 – Encroaching Forest Villas) 3 per day per character from Picnic Stowaway’s 6th Quest (W1 – Froggy Fields) |
Lumberbob Statue | More Chopping Power (+0.3 per level) | Crystal Carrot (W1 – Valley of the Beans) Mining (Any Ore you have 100% hit chance on) |
Thicc Skin Statue | More Base DEF (+1 per level) | Crystal Crabal (W2 – Jar Bridge) |
Oceanman Statue | More Fishing Power (+0.3 per level) | Catching (Any W2 Catching Source you have 100% chance on) |
Ol Reliable Statue | More Catching Power (+0.3 per level) | Crystal Crabal (W2 – Jar Bridge) |
Exp Book Statue | +% Class EXP (+0.1% per level) | Crystal Crabal (W2 – Jar Bridge) |
Anvil Statue | +% Anvil Production Speed (+0.5% per level) | Crystal Crabal (W2 – Jar Bridge) |
Cauldron Statue | +% Alchemy EXP (+0.5% per level) | Crystal Crabal (W2 – Jar Bridge) |
Beholder Statue | +% Crit Chance (+0.2% per level) | Crystal Carrot (W1 – Valley of the Beans) |
Bullseye Statue | +% Accuracy (+0.8% per level) | Wood Mushroom (W1 – Where the Branches End) |
Box Statue | More Trapping Power (+0.3 per level) | Penguin (W3 – Signature Slopes) |
Twosoul Statue | More Worship Power (+0.3 per level) | Quenchie (W3 – Waterlogged Entrance) |
EhExPee Statue | +% Skill EXP (+0.1% per level) | 10K per character from Monolith’s 3rd Quest (W4 – Flamboyant Bayou)  Bloodbone (W3 – Hell Hath Frozen Over) (Use DK for this) |
Seesaw Statue | +% Construction EXP (+0.5% per level) | Cryosnake (W3 – Cryo Catacombs) |
Pecunia Statue | +% Coins from Mobs (+1% per level) |  Crystal Custard (W4 – Shelled Shores) |
Mutton Statue | +% Cooking EXP (+0.3% per level) | Crystal Custard (W4 – Shelled Shores) |
Egg Statue | +% Breeding EXP (+0.4% per level) | Crystal Custard (W4 – Shelled Shores) |
Battleaxe Statue | +% Damage (+0.2% per level) | Crystal Capybara (W5 – OJ Bay or The Worm Nest) |
Spiral Statue | +% Divinity EXP (+1% per level) | Crystal Capybara (W5 – OJ Bay or The Worm Nest) |
Boat Statue | +% Sailing Speed (+0.5% per level) | Crystal Capybara (W5 – OJ Bay or The Worm Nest) |
Compost Statue | +% Farming EXP (+0.4% per level) |  Crystal Candalight (W6 – Chieftain Stairway) |
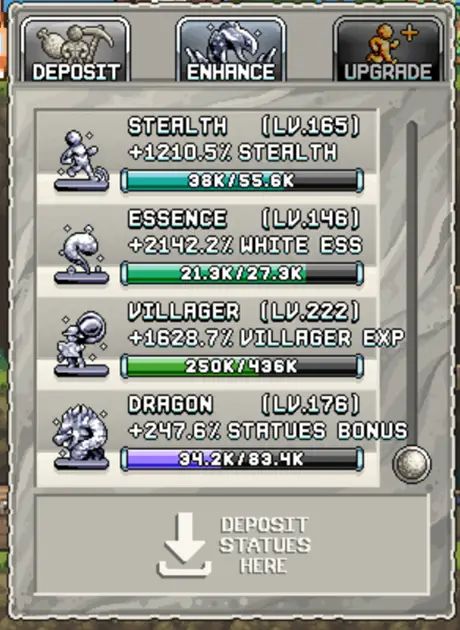
Stealth Statue | +% Sneaking Stealth (+0.3% per level) | Crystal Candalight (W6 – Chieftain Stairway) |
Essence Statue | +% White Essence in Summoning (+0.6% per level) | Crystal Candalight (W6 – Chieftain Stairway) |
Villager Statue | +% Villager EXP (+0.3% per level) |  Gloomie Mushroom (W5 – The Hole – Room 9) |
Dragon Warrior Statue | +% All Statue Bonuses (+0.2% per level) |  Ancient Golem (W5 – The Hole – Room 15) |
As you might notice, the Kachow statue is notoriously difficult to farm, so try to get all other statues to Onyx and max out your deposit doubler vial before depositing any of those, if you haven’t already.
All the ways to increase Statue Bonuses
While getting statues to Onyx should be your main goal, there are a few extra ways to boost their effects even further.
The main key is to get as many Onyx Statues as possible before starting to deposit your statues the normal way, but the following aspects will boost your Statue game even further.
| Item | Effect | Explanation |
|---|---|---|
Skinny 0 Cal Vial | +% Chance to get double points when depositing statues (+2.5% per level). So depositing a stack of 100 statues would count as 200 statues. | This is crucial as eventually you will get over +100% double statue chance, doubling all your deposits |
Vial Mastery (The Rift) | Each maxed out vial boosts other vials by 1.02x | This will boost the above vial so you can get it to 100% double deposit chance |
 Startue Exp (Yellow Bubble #3) | Levelling up a statue resets its EXP bar to X% instead of 0% | This will also increase the amount of levels you get from statues once you start depositing them |
The Onyx Lantern (Sailing Island #15) | The base artifact boosts Onyx Statues by 2.3x, but you can boost this many times higher by getting the Sovereign Artifact. | This will boost the effects of all your Onyx Statues (and due to boosting the Dragon Statue, it will boost all statues even further) |
Voodoo Statufication (Voidwalker Talent) | All statues give higher bonuses to all characters | This is a fantastic Talent to max out as it will boost all your statues effects by over +100% when maxed out! |
Dragon Warrior Statue | Boosts all other Statues bonuses | This boosts every other statue, so technically it’s the best statue! |
Onyx Statues | Each Onyx Statue doubles its base bonus and increases other statues bonuses by +10% | Make sure to Onyx all your statues for maximum benefits |
The most important booster is the Vial, as it will allow you to double your deposited statues, especially ones like the Kachow statue which can’t be grinded through killing mobs, so getting double deposits from them is a huge bonus!
Sadly as you might notice statues are not boosted by nearly as many aspects as Gold Foods.
Optimal Class & Build to Grind Statues
When it comes to farming statues in Idleon, there are two options, Divine Knight or Elemental Sorcerer.


The key difference is that when you’re farming Crystal Mobs, you should always use the Divine Knight as he provides a higher drop rate and allows for very fast respawning of mobs.
Check out our Drop Rate guide for a more information about a Max Drop Rate Crystal Mob DK Build!
There are three crucial talents you need to equip to make a Divine Knight effective:
| Talent | Description | Effect |
|---|---|---|
Divine Intervention | While active, if all mobs on screen are dead, instantly revive all of them. Also boosts Crit Damage. | Level 100: +50% Crit Dmg Level 200: +80% Crit Dmg (the talent has a 100% uptime, so don’t need to wait for a cooldown) |
Orb Of Remembrance | +1% Active EXP and Drop Rate per mob kill while Orb is active | Level 100: Lasts for 70 seconds Level 300: Lasts for 150 seconds (the talent cooldown is 150 seconds at all levels) |
Knightly Disciple | Spawn a knight disciple who generates shockwaves | Level 100: Spawns shockwaves for 25 seconds Level 200: Spawns shockwaves for 40 seconds (the talent cooldown is 40 seconds at all levels) |
The combination of these three talents will allow you to get a huge boost in Drop Rate while constantly respawning all mobs, including Crystal Mobs, as long as you can clear the whole map fast. This means any flat map is perfect due to Knightly Disciple’s limited range.
When a Statue is dropped from a normal monsters default drop table instead of a Crystal Mob, the Elemental Sorcerer can use its Dimensional Wormhole talent to spawn a lot more normal mobs with an exponentially increasing Drop Rate.
The Wormhole doesn’t spawn Crystal Mobs or Giant Mobs.
| Talent | Description | Effect |
|---|---|---|
 Dimensional Wormhole | Spawns Wormhole Mobs that give +% EXP & Drop Rate per Wormhole kill and each kill instantly respawns a normal mob on the map. The Drop Rate boost only affects the primary Loot Table (the first page you seen when you click a monster card) | Talent cooldown is 120 seconds at all levels! Level 100: +10% EXP & DR per kill Portal lasts for 63 seconds. Level 385: +14.39% EXP & DR per kill Portal lasts for 120 seconds! |
As you can infer from the the table, the Wormhole talent has a 2 minute cooldown and once you level it up to at least 385, you will be able to keep grinding the Wormhole without any breaks.
Next, let’s check out what cards you should equip for each class.
Both classes’ cards will mainly focus on whatever cards give you the most Drop Rate, except for the DK build you must have the 2 Crystal Mob cards as well.
| Card | Source | Effect |
|---|---|---|
Poop (Use only on DK) | Poop (W1 – Poopy Sewers) | +% Crystal Mob Spawn Chance 1 Star: +20% 4 Star: +50% Ruby: +60% |
Demon Genie (Use only on DK) | Demon Genie (W4 – Outskirts of Fallstar Isle) | +% Crystal Mob Spawn Chance 1 Star: +30% 4 Star: +75% Ruby: +90% |
Emperor | Emperor (W6 – Emperor’s Castle Doorstep) | +% Total Drop Rate 1 Star: +24% 4 Star: +60% Ruby: +72% |
Minichief Spirit | Minichief Spirit (W6 – Chieftain Stairway) | +% Total Drop Rate 1 Star: +16% 4 Star: +40% Ruby: +48% |
King Doot |  King Doot Boss (Check our King Doot Guide) | +% Total Drop Rate 1 Star: +12% 4 Star: +30% Ruby: +36% |
Mister Brightside | Mister Brightside (W5 – The Killer Roundabout) | +% Total Drop Rate 1 Star: +12% 4 Star: +30% Ruby: +36% |
Crystal Carrot | Crystal Carrot (Any W1 Map) | +% Total Drop Rate 1 Star: +10% 4 Star: +25% Ruby: +30% |
Bop Box |  Bop Box (W3 – Overpass of Sound) | +% Total Drop Rate 1 Star: +7% 4 Star: +17.5% Ruby: +21% |
Giftmas Blobulyte & Mr Blueberry | Timed-Event drops, usually only available during Christmas and Summer events | +% Total Drop Rate 1 Star: +6% 4 Star: +15% Ruby: +18% |
Mimic | Mimic (W2 – The Mimic Hole) | +% Total Drop Rate 1 Star: +4% 4 Star: +10% Ruby: +12% |
After you set up the best cards you have available, it’s time to boost the Crystal Monster rate for DK.
While these chips are crucial for boosting the Crystal Mob spawn rates, they will obviously be amazing to boost your drop rate cards as well when farming normal mobs, boosting the Ruby Emperor Cards bonus to a whopping +144% Total Drop Rate.
| Lab Chip | Effect |
|---|---|
Omega Nanochip | Doubles the effect of the Card in the top left slot. |
Omega Motherboard | Doubles the effect of the Card in the bottom right slot. |
The other chips you use are not as crucial to the build, so just pick ones that boost your active fighting gains, like the Potato Chip for basic attack speed, Galvanic Nanochip for Monster Respawn rate and the various Misc Bonus doubler chips to boost gains from your Trophy and equips.
These will provide the core building blocks for your Statue Farming build, but make sure to check out the Drop Rate build we linked at the beginning of this section to get even more Drop Rate and improve your chances of getting those Statue drops.