The second world in Idleon, Yum Yum Desert, is packed with interesting quests and even better rewards. You will receive tons of gems, stamps and time candies once you complete these quests and most of them are not nearly as complicated as some of the World 1 quests.
Check the World 1 quest article below for reasons why you should complete as many quests as possible as well as what the most important rewards are for those quests.
We will not show class experience or coin rewards in the tables, as they’re not really relevant since quests are not a significant way to gain money or experience (and they would needlessly clutter the tables).

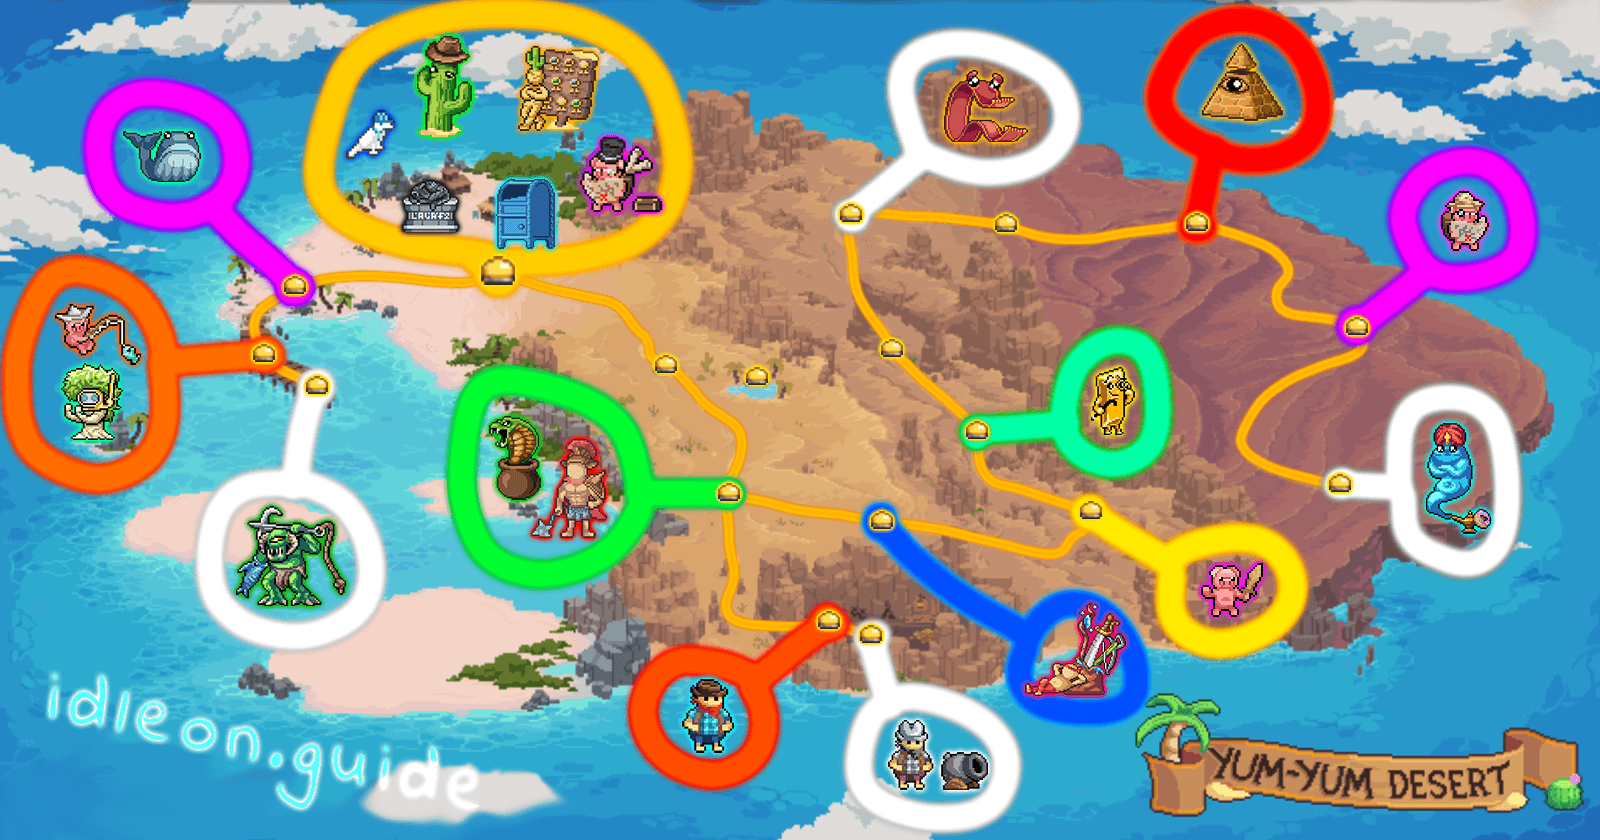
Cowbo Jones

Map: YumYum Grotto (World 2 Town)
Cowbo Jones is your guide to going through World 2 and has plenty of storage space to give out similar to Scripticus in World 1. However these quests are a lot more complicated to finish up as you must do multiple full questlines from other NPC’s which require a lot of crafting and effort.
Show 6 Important Rewards
| Quest Name | Useful Reward |
|---|---|
| The Hatless Howerhouse! (#2) | |
| Bake Him Away, Toys (#8) | |
| Commence Criminal Crimes! (#10) | |
| Oh No, not the Elderly! (#13) | |
| Tomb Raid (#14) | (Used for Cowbo Jones last quest to craft Easy YumYum Dez NPC Token) |
| The New Sheriff (#15) | (+2 Weapon Power, +25 DEF, +8 STR/AGI/WIS/LUK, +12% Boss Damage) |
Show All 15 Quests
| Quest | Requirements | Rewards |
|---|---|---|
| 1. The Grind Begins…? | Kill a few Sandy Pots until the quest completes. You don’t actually need to kill 100K | |
| 2. The Hatless Howerhouse! | Kill 20 Sandy Pots without your hat equipped | (+3 slots) |
| 3. No Country for One Character | Have a total of 4 characters on your account | |
| 4. Say Goodbye to your Dubloon! | (You can buy this from the World 2 Town Shop) | |
| 5. Alchemial Apprentice | Unlock a Bubble from Alchemy and buy 1 Distilled Water from the Alchemy Shop (second tab) | |
| 6. Three Vials? Those are Rookie Numbers! | Unlock 2 Alchemy Vials | – |
| 7. The Notorious B.O.B | Find Bandit Bob by going through the portal at the bottom of The Mimic Hole map. (Climb on the platform above him before clicking on him to avoid getting shot) | |
| 8. Bake Him Away, Toys | Complete the first 3 quests from Bandit Bob to get a Signed Arrest Warrant | (+2 Slots) |
| 9. A Hat in Crime | (+2 STR, +3 DEF, +25 Base DMG) (50% chance for +5 Random Stat) | |
| 10. Commence Criminal Crimes! | Complete Goldric’s 5 first quests (you can only start the first one after this quest has been started) | (+2 Slots) |
| 11. The Worst Trade Deal in History | Buy 10 Golden Dubloons, then sell them to the same shop | |
| 12. Children? What’d they ever do for Me… | Buy the Small Donation 4 times in the Alchemy Shop | |
| 13. Oh No, not the Elderly! | Complete Carpetiem’s quests | (+2 Slots) |
| 14. Tomb Raid | Defeat Efaunt and collect the Crystal from him (World 2 Boss) | |
| 15. The New Sheriff | Craft all the World 2 Tokens (he drops all the recipes when you activate the quest) | (+2 Weapon Power, +25 DEF, +8 STR/AGI/WIS/LUK, +12% Boss Damage) |
Obol Altar

Map: YumYum Grotto (World 2 Town)
This is the altar that holds all your Obols, which provide bonuses to each character ranging from damage to skill efficiency and even drop rate. The bonuses are negligible early on but once you unlock better obols, the bonuses turn significant.
Put your best obols into the Family tab first, as they’re shared by all characters!
Show 1 Important Reward
| Quest Name | Useful Reward |
|---|---|
| Bad Kitty, get off that altar! (#1) | Unlocks the use of the Obol Altar |
Show 1 Quest
| Quest | Requirements | Rewards |
|---|---|---|
| 1. Bad Kitty, get off that altar! | (Buy it from the World 2 Town Shop) | Unlocks the use of the Obol Altar |
Desert Davey
Map: YumYum Grotto (World 2 Town)
A familiar face in different color, simply provides you with access to a whole new set of tasks, achievements and recipes in World 2. A single easy quest with a generous 50 gem reward.
Show 1 Important Reward
| Quest Name | Useful Reward |
|---|---|
| U Cool? (#1) | Unlocks World 2 Tasks |
Show 1 Quest
| Quest | Requirements | Rewards |
|---|---|---|
| 1. U Cool? | (You can craft all of these from Anvil Tab 1 after unlocking the recipes from the Taskmaster’s Unlock tab) | Unlocks World 2 Tasks |
Postboy Pablob

Map: YumYum Grotto (World 2 Town)
This is the Post Office, which provides tons of amazing bonuses to most base stats and skill efficiencies. You will be leveling these bonuses up all the way to the very end game so make sure to unlock this as soon as possible!
Show 1 Important Reward
| Quest Name | Useful Reward |
|---|---|
| Signed, Sealed and Lost in the Post (#1) | Unlocks the use of the Post Office |
Show 1 Quest
| Quest | Requirements | Rewards |
|---|---|---|
| 1. Signed, Sealed and Lost in the Post | (Craft from Anvil Tab 2) | Unlocks the use of the Post Office |
Constructor Crow

Map: YumYum Grotto (World 2 Town)
Constructor Crow unlocks the portal to World 3. Try to get this as soon as possible so you can start working on the various World 3 skills in the background while you finish the rest of World 2.
Show 1 Important Reward
| Quest Name | Useful Reward |
|---|---|
| Restoring Power to Another Portal (#1) | Unlocks portal to World 3 |
Show 1 Quest
| Quest | Requirements | Rewards |
|---|---|---|
| 1. Restoring Power to Another Portal | (Drops from Efaunt, the World 2 Boss) | Unlocks portal to World 3 |
Walupiggy

Map: YumYum Grotto (World 2 Town)
Walupiggy is a hidden NPC in World 2, which can be found by clicking on the “Click Me” text next to Cowbo Jones. He is hidden inside the ground behind that text.
His quests are difficult as they need walkthroughs to complete, but his rewards are also very nice as he gives out talent points and rare Time Candies.
Show 6 Important Rewards
| Quest Name | Useful Reward |
|---|---|
| Treasure Hunt 2 (#2) | |
| Treasure Hunt 3 (#3) | |
| Treasure Hunt 4 (#4) |
Show All 4 Quests
| Quest | Requirements | Rewards |
|---|---|---|
| 1. Treasure Hunt 1 | Official walkthrough video of Treasure Hunt 1 | |
| 2. Treasure Hunt 2 | Official walkthrough video of Treasure Hunt 2 | |
| 3. Treasure Hunt 3 | Official walkthrough video of Treasure Hunt 3 | |
| 4. Treasure Hunt 4 | Official walkthrough video of Treasure Hunt 4 |
Centurion

Map: The Mimic Hole
Finally a more robust Colosseum NPC who provides us with plenty of quests that are actually quite difficult early on, requiring you to speedrun Colosseums.
Sadly the rewards are once again not too great, other than time candies and a trophy (which you only get from the last quest which requires World 6 by which you probably have better ones already).
However you will get plenty of loot by simply clearing the dungeons and busting open those chests.
Show 2 Important Rewards
| Quest Name | Useful Reward |
|---|---|
| Down The Mimic Hole! (#1) | Unlocks ability to collect Colosseum tickets from him every day. |
| Glorious Gladiator (#8) | (+1 Weapon Power, +10% Damage Multiplier) |
Show All 8 Quests
| Quest | Requirements | Rewards |
|---|---|---|
| 1. Down The Mimic Hole! | Defeat all the Mimics on the map within 70 seconds | Unlocks ability to collect Colosseum tickets from him every day |
| 2. Which one of yous is the Mafia? | (Drops from Mafiosos) | |
| 3. High Scorer | Get a Colosseum score of over 200K (The faster you clear it, the higher your score) | |
| 4. Colosseum Champ! | Finish the colosseum with a score of over 350K | |
| 5. Colosseum GDQ | Beat World 1, 2 and 3 Colosseums with over 180 seconds remaining on the timer after beating each one. | |
| 6. Centurio Rank | Complete the World 4 Colosseum | |
| 7. Legatus Rank | Complete the World 5 Colosseum | |
| 8. Glorious Gladiator | Complete the World 6 Colosseum | (+1 Weapon Power, +10% Damage Multiplier) |
Snake Jar

Map: The Mimic Hole
Snake Jar has some complicated quests, especially his last quest which requires you to get another player to come with you and say “Hi” to the snake. This will require some interaction with other players and hope they want to help.
As for rewards, he gives a nice boost to your Storage slots as well as a token you need for Cowbo Jones’ trophy quest.
Show 2 Important Rewards
| Quest Name | Useful Reward |
|---|---|
| Red Stuff Bad! (#2) | |
| A Noob, served Medium Rare! (#4) | (Used for Cowbo Jones last quest to craft Easy YumYum Dez NPC Token) |
Show All 4 Quests
| Quest | Requirements | Rewards |
|---|---|---|
| 1. Lookin’ Like a Snack | (Dropped by Mimics) | |
| 2. Red Stuff Bad! | (You can buy these from the World 1 Town Shop and they drop from Poops, Rats, Walking Sticks, Nuttos and Wood Mushrooms) | |
| 3. PSA. You Are Being Eaten! | Stand next to the snake and click on him to take damage 4 times. You will need plenty of DEF and HP to survive. The Upgrade Vault is a quick way to boost up your DEF. Also equip multiple different foods to heal after each bite. | |
| 4. A Noob, served Medium Rare! | Get another player to stand next to the snake and have them say “Hi” in chat. |
Bandit Bob

Map: Bandit Bob’s Hideout
Bandit Bob can be found below the Mimic Hole and is also the entrance map to the World 2 Party Dungeon. His quests are needed for 2 of Cowbo Jones quests but other than that, his rewards are nothing special.
When you enter the map, climb on the platform above him before clicking on him. This will drop a few Bandit Bob cards, which increases money dropped from monsters.
Show 2 Important Rewards
| Quest Name | Useful Reward |
|---|---|
| Bringing Bob’s Boxes (#3) | (Used for Cowbo Jones quest) |
| The Desert Dungeon Prequest (#4) | (Used for Cowbo Jones last quest to craft Easy YumYum Dez NPC Token) |
Show All 4 Quests
| Quest | Requirements | Rewards |
|---|---|---|
| 1. Bullets for Bandit Bob! | (You unlock this recipe from the Taskmaster Unlocks tab) | |
| 2. Bob’s Brand New Bandana | (Drops from Sandy Pots) | |
| 3. Bringing Bob’s Boxes | Sign 2 “Plan-it Express” orders at the Post Office (it’s the second order in the Post Office, but you can only do it once per day) | |
| 4. The Desert Dungeon Prequest | (Drops from Mimics only from non-AFK kills) |
Gangster Gus

Map: Heaty Hole (Entrance at Bandit Bob’s Hideout)
Gus is the gatekeeper of the World 2 Party Dungeon and gives you a few dice and credits as rewards for getting far into the dungeon.
Show All 3 Quests
| Quest | Requirements | Rewards |
|---|---|---|
| 1. Plunderin Down Yonder | Play through the Party Dungeon. | |
| 2. Perfect Progress Score | Defeat the first boss that appears if you get 100% progress. | |
| 3. Snake Revival Denial | Defeat the second boss. |
Speccius
Map: Dessert Dunes
Speccius gives you your first subclass, so try to do this with all your characters as soon as possible to get access to new talents. Unlike World 1, this one requires a few materials to be collected first, but you can get them all by fighting Crabcakes and shouldn’t take long.
Show 1 Important Reward
| Quest Name | Useful Reward |
|---|---|
| Specialization Station (#2) | Unlocks the first subclass |
Show All 2 Quests
| Quest | Requirements | Rewards |
|---|---|---|
| 1. More like ‘Sleepius’ lmao | (Drops from Sandy Pots, Mimics and Crabcakes) | |
| 2. Specialization Station | Select a subclass | Unlocks your first subclass |
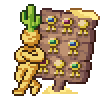
XxX Cattleprod XxX

Map: The Grandioso Canyon
Cattleprod has difficult quests but great rewards, giving out a whopping 5 stamps, especially the Mason Jar Stamp which increases carry capacity for all items.
His last quest is especially tedious as you must interact with other players.
Show 5 Important Rewards
| Quest Name | Useful Reward |
|---|---|
| Peak Gaming (#1) | (+% Ore Carry Capacity) (+Base Catching Efficiency) |
| Wait No, I meant Pathetic Gaming (#2) | (+% Carry Capacity for All items) (+% Fishing EXP) |
| Ok, NOW it’s Peak Gaming! (#3) | (Increases all stats eg. STR/WIS/AGI/LUK) |
Show All 3 Quests
| Quest | Requirements | Rewards |
|---|---|---|
| 1. Peak Gaming | Kill all Mafiosos before they respawn and in 30 seconds. | |
| 2. Wait No, I meant Pathetic Gaming | Kill 30 Mafiosos and 18 Sand Castles in 72 seconds. | |
| 3. Ok, NOW it’s Peak Gaming! | (drops from all World 2 mobs while the quest is active) (You can get these stars by asking any player whose name starts with a P or an S to say “1 star, game sucks!“) |
Goldric

Map: Shifty Sandbox
In order to do any quests for Goldric, you must first progress past Bandit Bob’s questline for Cowbo Jones.
Goldric is a very important NPC as his 5th quest rewards you with a Bag o Nuts which is required to make a Journeyman!
Show 2 Important Rewards
| Quest Name | Useful Reward |
|---|---|
| Dress to Impress (#5) | (Used to make a Journeyman) |
| Dont lay a finger on my Sheepies!!! (#6) | (Used for Cowbo Jones last quest to craft Med YumYum Dez NPC Token) |
Show All 6 Quests
| Quest | Requirements | Rewards |
|---|---|---|
| 1. Trickle Down Economics | Run over 15 copper coins (these coins spawn randomly on the ground on this map, so it’s easier to spot them with less killing. On PC you can use the arrow keys to run around, so you don’t accidentally click on portals) | |
| 2. Hoopsies | Pass through 15 hoops in a row in the Catching minigame (or 90 hoops total) | |
| 3. Only Winners have Portraits | ||
| 4. Criminal Code of Conduct | ||
| 5. Dress to Impress | Equip a gold helmet, platebody, platelegs and a golden tool. | |
| 6. Dont lay a finger on my Sheepies!!! | Defeat Sandcastles without killing any Sheeps (unequip your weapon and turn off auto-attack for this to be easier) |
Carpetiem

Map: Slamabam Straightaway
Carpetiem has difficult quests and mediocre rewards, but one of them requires crafting Bullets which you will need for Bandit Bob’s quest anyway and the Token he gives is needed for Cowbo Jones‘ last quest.
Show 1 Important Reward
| Quest Name | Useful Reward |
|---|---|
| Helping 100 times over (#4) | (Used for Cowbo Jones last quest to craft Med YumYum Dez NPC Token) |
Show All 4 Quests
| Quest | Requirements | Rewards |
|---|---|---|
| 1. Darn Lazy Gamers! | Kill 750 Mashed Potatos actively | |
| 2. Old Timey Craftin’ | Craft 250 Bullets without opening your chest. This means you need to have the following in your inventory before starting the quest: | |
| 3. Be like Buster! | Equip Boxing Gloves and kill the monster that spawns. If you don’t have the boxing gloves anymore, you can reclaim the Crimson String from your completed quests and craft them again. Then Forfeit and restart this quest to spawn the monster again. | |
| 4. Helping 100 times over | Say “The boomer aint so bad” to 30 different players. The fastest way to do this is to go to the World 1 Party Dungeon lobby and say it in chat. |
Loominadi

Map: Up Up Down Down
Loominadi is a mysterious NPC who gives you tons of gems as rewards for his quests, but grinding out the Vials and killing King Doot can get difficult, so make sure to check out our guides to help out on them. We linked them in the tables below.
Show 1 Important Reward
| Quest Name | Useful Reward |
|---|---|
| The Mummy of Mystery (#4) | (Used for Cowbo Jones last quest to craft Hard YumYum Dez NPC Token) |
Show All 4 Quests
| Quest | Requirements | Rewards |
|---|---|---|
| 1. Rhyming is Key! | (1 in 10K chance to drop from Moonmoons while this quest is active) | |
| 2. Uh, Something About Vials? | Upgrade 13 Vials to light-blue rarity. Check out our Vial guide for help! | |
| 3. Journey to the Center of the Blundermines | Reach the Ol’ Straightaway map in World 1. (The third map in the Mines, requires Mining Level 25) | |
| 4. The Mummy of Mystery | Kill King Doot. Check out our Doot guide! |
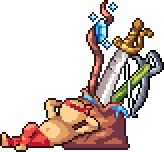
Wellington

Map: Sands of Time
Wellington is a tricky little piggy with some complicated quests, but he has some of the best rewards, including 5 new stamps and a great new Start Talent that gives you free Star Talent points.
Considering you only ever need 1 of each stamp to unlock them on all characters, these quests are not high on the priority list to complete on multiple characters.
Show 7 Important Rewards
| Quest Name | Useful Reward |
|---|---|
| Platforms in Disguise, Platsformers! (#1) | (+% Alchemy EXP) (+WIS) |
| Findin’ Fingerprints (#2) | (+% Catching Exp) (+% Multi-Fish chance) |
| You Can’t Run, but you Can Hide (#3) | (More Talent Points to Tab 2) |
| Puzzles and Math, a Winning Combination! (#4) | (Gives more Star Talent points) (Used for Cowbo Jones last quest to craft Hard YumYum Dez NPC Token) |
Show All 4 Quests
| Quest | Requirements | Rewards |
|---|---|---|
| 1. Platforms in Disguise, Platsformers! | Find the 3 invisible platforms. Check out our guide to find them! | (+% Alchemy EXP) (+WIS) |
| 2. Findin’ Fingerprints | (Drops from Tysons) (Drops from Moonmoons) (Drops from Sand Giants) | (+% Catching Exp) (+% Multi-Fish chance) |
| 3. You Can’t Run, but you Can Hide | Type in chat: “Darn you, Blobulyte! Why must you hide like a coward“ (you must type the capital letters, exclamation point and comma exactly as above!) | (More Talent Points to Tab 2) |
| 4. Puzzles and Math, a Winning Combination! | Do Wellingtons item drop puzzle. Check out our guide on how to do it easily! |
Djonnut

Map: Djonnuttown
Djonnut is the key to the World 2 boss, Efaunt, and completing his second quest allows you to start collecting more keys from him every day.
His token is one of the toughest to get in World 2, because it requires you to kill tons of World 3 monsters.
Show 2 Important Rewards
| Quest Name | Useful Reward |
|---|---|
| I’m Blue Dabadedada (#2) | Unlocks ability to collect Efaunt’s Tomb Keys every day by clicking on him |
| The Blue New World (#3) | (Used for Cowbo Jones last quest to craft Hard YumYum Dez NPC Token) |
Show All 3 Quests
| Quest | Requirements | Rewards |
|---|---|---|
| 1. Genie Dieting | (Drops from Moonmoons) (Drops from Sand Giants) | |
| 2. I’m Blue Dabadedada | Kill 4,000 Moonmoons and get 1 Ghost as a drop from them (1 in 2K chance, don’t send the drops straight to Storage if using Time Candies or the Ghost wont count) | Unlocks ability to collect keys every day by clicking on him |
| 3. The Blue New World | (Drops from Frost Flakes in W3) (Drops from Bloques in W3) (Drops from Mamooths in W3) |
Whattso

Map: Salty Shores
Whattso is your introduction to fishing and gives you your first fishing tools that increase your chances of catching certain types of fish. You will get plenty more from monsters in later worlds.
Show 1 Important Reward
| Quest Name | Useful Reward |
|---|---|
| Bobbin’ Bobbers (#3) | (Used for Cowbo Jones last quest to craft Easy YumYum Dez NPC Token) |
Show All 4 Quests
| Quest | Requirements | Rewards |
|---|---|---|
| 1. Mopey Dick | ||
| 2. The Whaley Hard Minigame | Get a score of 11 or more from a Fishing Minigame | |
| 3. Bobbin’ Bobbers | Get a total score of 50 across all your Fishing Minigames | |
| 4. The Biggest Fish in the Sea…? | Catch a whale from a Fishing Minigame (this requires you to catch many fish in a row without missing) | (This one tells you how to get a Fishing Trophy by catching 2 Whales in a row, then getting to a third one and missing it on purpose. All this has to be done withing a single Minigame, making it extremely difficult. The scroll itself is useless and can be sold) |
Fishpaste97

Map: Faraway Piers
Fishpaste gives two stamps, one of which gives more Star Talent points and that’s always useful. Other than that, he is a fairly uneventful NPC, considering how difficult it can be to catch 3 hermit cans in a row.
Show 3 Important Rewards
| Quest Name | Useful Reward |
|---|---|
| ‘Accidental’ Exploit (#1) | (+Base Fishing Efficiency) |
| Can you do the Can Can? (#2) | (More Star Talent points) (Used for Cowbo Jones last quest to craft Med YumYum Dez NPC Token) |
Show All 2 Quests
| Quest | Requirements | Rewards |
|---|---|---|
| 1. ‘Accidental’ Exploit | (Catch from Bandit Bob’s hideout in World 2) | (+Base Fishing Efficiency) |
| 2. Can you do the Can Can? | (this is based on pure luck and might take a very long time of active fishing. You can try to swap around your fishing tools to improve Yellow Depth) | (More Star Talent points) |
Scubidew

Map: Faraway Piers
Scubidew is a very simple NPC with very easy quests and also gives away some fishing gear to help you catch some more specific fish.
Show 1 Important Reward
| Quest Name | Useful Reward |
|---|---|
| A Normal Quest. (#3) | (Used for Cowbo Jones last quest to craft Hard YumYum Dez NPC Token) |
Show All 3 Quests
| Quest | Requirements | Rewards |
|---|---|---|
| 1. Don’t Step to Me, Bro! | ||
| 2. Uncovering the Deep Sea State!!! | Catch 5 fish in 2 minutes (If you use a Barbarian, the Worming Undercover talent makes this a lot easier) | |
| 3. A Normal Quest. |
Omar Da Ogar
Map: Deepwater Docks
Omar is the caretaker of Island Expeditions but has plenty of quests as well which take quite a while to complete. His main rewards include various fishing rings, which can be useful before you unlock Serrated Rex Rings from Party Dungeons.
The main reason why you want to complete his quests, is because for each quest you complete, you get 10% more Message Bottles every day for Island Expeditions. (Up to a total of +60% more bottles if you complete every quest!)
Show All 6 Quests
| Quest | Requirements | Rewards |
|---|---|---|
| 1. Helping Omar | ||
| 2. Helping Omar Again | (+4 Fishing Power, +6 STR, +2 AGI, +20 Yellow Depth) | |
| 3. Helping Omar A 3rd Time | ||
| 4. Helping Omar Some More | (+8 Fishing Power, +9 STR, +3 AGI, +30 Red Depth) | |
| 5. Helping Omar Yet Again Deja Vu | (Increases Fishing Speed by 30%, 1% chance to be consumed per fish caught) | |
| 6. Helping Omar For The Final Time | (+14 Fishing Power, +12 STR, +4 AGI, +40 Purple Depth) |
You’ve reached the end of all World 2 Yum Yum Desert quests and you should be proud. There is an insane amount of rewards to be gained, some better than others, but it’s definitely worth grinding them out.
Make sure to go to World 3 as soon as possible so you can start accumulating all those new mechanics that come with it, as you will be utilizing them for the rest of the game.
If you see anything missing or outdated in this guide, make sure to let us know from our About page!