
Money farming or in the case of Idleon, getting more coins has never been a huge point of interest until The Upgrade Vault was added to the game. Now you will be grinding money and will never have enough to max out every upgrade.
Drop Rate is one of the most important stats in the game and has a big impact on money gains. We will go over how to maximize it, to get the most out of your Active and AFK gains.
This process can be as simple or as complex as you wish, from the simple outline of more drop rate equals more coins, to having the perfect class, build, talents, gear and cards to maximize your coin gains.
This guide is by far the biggest we’ve ever written and will cover everything you need to know when it comes to getting more money and Drop Rate in Idleon as well as plenty of useful tips and tricks on how to get to those beautiful black and gold Eclipse Coins!
You will learn a lot and get a great versatile build perfect for Drop Rate and Money Gain, so take your time and go over the guide with some thought. Also due to the huge scale, if you notice we missed something useful or something is outdated, please let us know and we will update it.

Where to get Coins and why you need more!
Let’s start off with a quick summary on what kind of coin sources there are and why you need so many of them.
There are currently 15 different types of coins in Idleon and they work like any normal currencies, scaling up once you reach 100 of the previous coin.
| Coin | Requirement |
|---|---|
| – | |
| Coin | Requirement |
|---|---|
While you can get some coins from selling items to vendors and completing quests, the main way to get more money is simply by killing monsters. The other ways provide such miniscule rewards that they’re not noticeable in the long run.
The main part of this guide will focus on how to increase your drop rate and money gain percentage, which will increase the amount of money dropped by monsters.

But what are the main uses for money, since we need a full dedicated build for it? The main mechanic that requires tons of money are Stamps, as they scale infinitely and their level up costs increase exponentially, however high stamp level gains are so small that they’re not a good enough reason to keep grinding money.
This is where the Upgrade Vault comes in. All of the upgrades there are bought with coins and some of them are extremely expensive. The bonuses from the vault are so massive that they are worth grinding money for! Check our Vault guide to see what you can look forward to unlocking from it and why.

Other than that, you will also need coins for bribes, anvil points, forge upgrades, buying kitchens in World 4 and maxing out Divinity God upgrades in World 5.
Next lets go over the crucial difference between Drop Rate and Money Gain % which are both important, but not made equal.
Drop Rate vs Money Gain % Explained
Before we get to the actual meat of the money farming guide, you need to understand how Drop Rate (also known as DR or Drop Rarity or Drop Chance) works and why it’s more important that the various Money Gain bonuses.
The main concept to understand is that your Drop Rate multiplies your money gain bonuses, so it’s much more important to focus on. Money Gain percentage just adds to the never-ending money bonuses in a non-multiplicative way, so it’s less effective.
The weird thing about Drop Rate in Idleon is that it only significantly boosts your money gains after every odd number multiplier after 4x (meaning numbers that are not divisible by 2, for example 5, 7, 9, 11, 13, 15 etc.)
| Drop Rate | Money Gain Multiplier % |
|---|---|
| 1.00x | 100% |
| 1.50x | 150% |
| 2.00x | 200% |
| 3.00x | 300% |
| 4.00x | 400% |
| 5.00x | 600% |
| 7.00x | 800% |
| 9.00x | 1,000% |
| 11.00x | 1,200% |
| 13.00x | 1,400% |
As you can see from the table, the money gain starts to only become multiplied for odd numbers later on, so if your Drop Rate is 5, you will get a 600% money multiplier, but if you reach 6, you will still get the same 600%, so it becomes crucial to just try to reach the next odd numbered Drop Rate, in this case 7, which will add another 200% to the multiplier.
This means if your Drop Rate is 5x, unless you can reach 7x with Cards, Gear and other bonuses, it’s better to focus on Money Gain % bonuses until you can reach the next threshold.
This concept is important to understand to get the most out of your money gains, but in the long run, this wont make or break your build, as your main money gains will come from the various boosts explained in the rest of the guide.
Which class is best for Money Farming?
The next crucial step is to pick the character you want to use for getting those coins. You might think a class like Journeyman would be optimal as they have talents dedicated to increasing money gains, but that is not the case as they’re terrible at getting tons of kills.
Thankfully there are only two viable alternatives which makes the choice easier, Bubonic Conjuror also known as Bubo or Divine Knight also known as DK.
You can see how to acquire these classes from our Class Priority guide.


Overall the Divine Knight is the best option but only in the very end game, once you have a very high Drop Rate. The reason why DK becomes better later on is because of the Orb of Remembrance talent which increases Drop Rate by +1% per mob kill while it is active, but when your base Drop Rate is low, this wont make a big enough difference in comparison to Bubo’s huge kill rate.

The reason why Bubo is so amazing at farming money before you have a massive Drop Rate, is because it is so good at clearing maps of mobs very fast and instantly respawning them.
All money farming must be done while actively playing so you can get Crystal Mob kills which only spawn while actively fighting (this will become clear from Lab bonuses later in the guide), which is why these two classes are so good at grinding these kills.
The key to making your Bubonic Conjurer a beast at money farming is by maxing out your Auspicious Aura, Flatulent Spirit and Raise Dead talents to kill and respawn mobs fast.

We covered the perfect Bubo build in our Cranium Cooking build guide, so you should use that build for money farming as well. We will cover the important Star Talents and gear later in this guide.
Check the guide above for all the important talents, but these are the most crucial ones to get the most kills and thus the most money:
| Talent | Description | Reasoning |
|---|---|---|
 Auspicious Aura | Casts an aura which heals you and damages monsters | This is a crucial damage dealing attack for this build, damages faster than gas clouds |
 Flatulent Spirit | Moves around and drops poison clouds. Damage is based on the Chemical Warfare talent | This is the main attack alongside Auspicious Aura that will cover the whole map and should kill everything in 1 hit (if it doesn’t, you need to focus on getting higher damage before higher drop rate) |
 Raise Dead | Respawns all dead monsters within an X pixel radius | Constantly respawns all the enemies, extremely important to be able to get as many kills as fast as possible. |
When it comes to Bubo, one of the biggest bonuses is that while you are grinding for money, you will also get progress towards Cranium Cooking which you wont get when using Divine Knight, but the money will be A LOT better in the end game with DK, which can be worth the swap eventually.
As for the Divine Knight, it is a bit easier as it has three important talents (Bubo has more than the three shown above, as explained in the CC guide), the Divine Intervention, Knightly Disciple, and Orb of Remembrance, .
| Talent | Description | Reasoning |
|---|---|---|
Orb of Remembrance | +1% Active EXP and Drop Rate per mob kill while Orb is active | This is the key for the DK build. It boosts your Drop Rate when actively killing monsters. Will only be significant when your base Drop Rate is high enough. |
Divine Intervention | While active, if all mobs on screen are dead, instantly revive all of them | Similar to Bubos Raise Dead talent, but requires a map where you can kill every monster fast enough without running around too much. |
Knightly Disciple | Spawn a knight disciple who generates shockwaves | This will kill all mobs fast if the map has monsters on a single platform, so you can trigger Divine Intervention fast. |
These three talents will make Divine Knight amazing at money farming on small maps as your Drop Rate will get boosted to new heights. The map pool where this is efficient is fairly limited though, while Bubo will work well on any map.
Currently the best map to farm money on DK is World 6 – Chieftain Stairway due to the simple monster spawns, while for Bubo you can go all the way up to World 6 – Emperor’s Castle Doorstep for a huge map but more mobs.

Active Farming Tip
Make sure to use the Item Filters in the Cards tab to disable any normal item drops from the monsters you are killing, so you’re inventory doesn’t fill up even after hours of fighting!
The rest of the class specific talents are not as crucial for these builds, so just level up the ones that give you more damage to be able to utilize the World 3 prayers covered later in the guide.
Lets check out all the Star Talents that you should utilize for more Drop Rate and Money Gain next.
Important Star Talents for more Drop Rate and Coins
There are plenty of useful Star Talents that boost things like damage and other aspects, but we wont cover most of them here as they are not directly helping with the money farming aspect. Check out our Star Talent guide for a better overview of all the useful talents.
Let’s go over the most important Star Talents for money farming.
| Talent | Source | Effect |
|---|---|---|
 Cash Money | Any World 1 Enemy (Drop chance depends on enemy Green Mushroom = 1 in 833K Gigafrog = 1 in 400K) | All monsters drop +% more coins Level 1: +1.37% coins Level 100: +46.67% coins |
Crystals 4 Dayys | Picnic Stowaway (9th quest at World 1 Froggy Fields) | Higher Crystal Monster spawn chance, very important for more money drops! Level 1: +3.41% chance Level 100: +116% chance |
Will of the Eldest | Scripticus (7th quest at World 1 Town) | +1 STR/AGI/WIS for every 10 Levels of your highest leveled character Level 1: Caps at +1 Level 50: Caps at +50 |
Coins For Charon | Talent Book Library (Unlock through Library VIP Membership from Breeding Arena) | More cash per Multikill Damage Tier (check out our multikill guide) Level 1: +0.33% Cash per Multikill tier Level 100: +14.29% Cash per Multikill tier |
American Tipper | Talent Book Library (Unlock through Library VIP Membership from Breeding Arena) | More cash per 10 Cooking levels Level 1: +0.79% Cash per cooking level Level 100: +40% Cash per cooking level |
 Stat Overload |  World 5 Merit Shop | More Total STR/AGI/WIS Level 1: +1 Total Stats Level 300: +300 Total Stats |
 Dummy Thicc Stats |  Island Expeditions World 2 Shimmer Island Shop | +% STR/AGI/WIS per POW 10 best DPS on the Shimmer Island Target Dummy Level 1: +0.007% All Stats Level 200: +0.28% All Stats |
 Boss Battle Spillover | Weekly Battle Shop World 2 YumYum Grotto | Higher Drop Rate for each completed boss battle difficulty. (resets every week, boss has max 5 difficulties to beat) Level 1: +0.25% Drop Rate for each boss difficulty Level 100: +12.5% Drop Rate for each boss difficulty |
These talents will boost your money gains and Drop Rate quite a lot, but the Talent Book Library talents might take quite a few attempts to get a high level on them.
Now we’re done with all the important build related talents, so let’s move onto the more interesting bonuses.
We attempted to showcase bonuses in somewhat logical order, traversing from World 1 to the later Worlds in order, but let’s start off with the Cards, which make the biggest difference when it comes to spawning more Crystal Mobs.
Optimal Money Farming Card Setup
There are two crucial cards that you must use to get a huge boost the amount of Crystal Mob spawns, but the other 6 cards depend on what your current stats are.
Starting off with the two important cards (you unlock Ruby Cards from The Rift)
| Card | Source | Effect |
|---|---|---|
Poop | Poop (World 1 – Poopy Sewers) | +% Crystal Mob Spawn Chance 1 Star: +20% 4 Star: +50% Ruby: +60% |
Demon Genie | Demon Genie (World 4 – Outskirts of Fallstar Isle) | +% Crystal Mob Spawn Chance 1 Star: +30% 4 Star: +75% Ruby: +90% |
Place these two cards in the top left and bottom right slots, as they will be doubled by Lab chips (explained later in the guide).
The other cards depend mainly on your current Drop Rate.
Place as many Drop Rate cards as you need to reach your next odd Drop Rate multiplier (explained earlier in the Drop Rate section of the guide). If you can’t reach a new tier with Drop Rate cards, just use Money Gain cards for everything instead.
Here are all the possible Drop Rate cards you can use, pick the highest percentages you have available:
| Card | Source | Effect |
|---|---|---|
Crystal Carrot | Crystal Carrot (Any W1 Map) | +% Total Drop Rate 1 Star: +10% 4 Star: +25% Ruby: +30% |
Mimic | Mimic (W2 – The Mimic Hole) | +% Total Drop Rate 1 Star: +4% 4 Star: +10% Ruby: +12% |
Bop Box |  Bop Box (W3 – Overpass of Sound) | +% Total Drop Rate 1 Star: +7% 4 Star: +17.5% Ruby: +21% |
Mister Brightside | Mister Brightside (W5 – The Killer Roundabout) | +% Total Drop Rate 1 Star: +12% 4 Star: +30% Ruby: +36% |
Ancient Golem |  Ancient Golem (W5 – Room 15 in The Hole) | +% Total Drop Rate (Passive so don’t need to equip!) 1 Star: +8% 4 Star: +20% Ruby: +24% |
Minichief Spirit | Minichief Spirit (W6 – Chieftain Stairway) | +% Total Drop Rate 1 Star: +16% 4 Star: +40% Ruby: +48% |
King Doot |  King Doot Boss (Check our King Doot Guide) | +% Total Drop Rate 1 Star: +12% 4 Star: +30% Ruby: +36% |
Domeo Magmus | Domeo Magmus Boss (W5 – The Killer Roundabout) | +% Total Drop Rate (Passive so don’t need to equip!) 1 Star: +3% 4 Star: +7.5% Ruby: +9% |
Emperor | World 5 Boss (Can only get through Card Packs for now) | +% Total Drop Rate 1 Star: +24% 4 Star: +60% Ruby: +72% |
Giftmas Blobulyte | Timed-Event drops, usually only available during Christmas events | +% Total Drop Rate 1 Star: +6% 4 Star: +15% Ruby: +18% |
Mr Blueberry | Timed-Event drops, usually only available during Summer events | +% Total Drop Rate 1 Star: +6% 4 Star: +15% Ruby: +18% |
Idleon 4th Anniversary | Timed-Event drops, currently drops during the Anniversary Event | +% Total Drop Rate (Passive so don’t need to equip!) 1 Star: +4% 4 Star: +10% Ruby: +12% |
Below you can see all the possible cards that increase your money gains that you can use in the remaining slots:
| Card | Source | Effect |
|---|---|---|
Nutto | Nutto (W1 – Hollowed Trunk) | +% Money from Monsters 1 Star: +10% 4 Star: +25% Ruby: +30% |
Bandit Bob |  Bandit Bob NPC (W2 – Bandit Bob’s Hideout) | +% Money from Monsters 1 Star: +2% 4 Star: +5% Ruby: +6% |
Purp Mushroom |  Purp Mushroom (W4 – Spaceway Raceway) | +% Money from Monsters 1 Star: +16% 4 Star: +40% Ruby: +48% |
Molti | Molti (W5 – Erruption River) | +% Money from Monsters (Passive so don’t need to equip!) 1 Star: +14% 4 Star: +35% Ruby: +42% |
Baba Yaga |  Baba Yaga Boss (Check out our Baba Yaga guide) | +% Money from Monsters 1 Star: +20% 4 Star: +50% Ruby: +60% |
Dilapidated Slush | Dilapidated Slush Boss (W3 – Refrigeration Station) | +% Money from Monsters 1 Star: +24% 4 Star: +60% Ruby: +72% |
Sacrilegious Kattlekruk | W5 Boss (Nightmare Difficulty) (W5 – Miner Mole Outskirts) | +% Money from Monsters 1 Star: +36% 4 Star: +90% Ruby: +108% |
Meaning of Giftmas | Timed-Event drops, usually only available during Christmas events | +% Money from Monsters 1 Star: +6% 4 Star: +15% Ruby: +18% |
Now that you have the perfect money farming card setup, let’s move on to other World 1 bonuses that you should utilize for more coins.
Crucial Upgrade Vault Bonuses for Money Farming
Since the idea for this whole guide sparked from the addition of the Upgrade Vault, it’s time to check out the insane bonuses it also provides for gaining more coins.
The table below contains the Vault Upgrades that you should buy up for this build.
Make sure to read our Vault Guide to also understand the various upgrades that boost and discount other upgrades!
| Upgrade | Effect | Explanation |
|---|---|---|
Monster Tax | More coins dropped from mobs. Level 1: +2% Coins Level 500: +1,000% Coins | This is the first big bonus to money gains and as you can see, it goes up to a whopping 1K percent making it a huge boost! |
Mining Payday | More Coins per Power of 10 ores mined on all characters. Level 1: +2% Coins Level 40: +80% Coins | Also a massive boost that can go to over +1,000% depending on how long you have been mining ores. |
Bored To Death | More coins dropped from mobs per Power of 10 Bored Bean kills. Level 1: +5% Coins Level 10: +50% Coins | Not as massive early on as there’s no other big reason to kill a lot of Beans, but eventually can get to well over +500% coin gain boost! |
Drops For Days | Higher Drop Rate. Level 1: +1% Drop Rate Level 50: +50% Drop Rate | A solid boost to Drop Rate for a very total cost. |
Dirty Money | More coins dropped from mobs per Power of 10 Poop kills. Level 1: +2% Coins Level 25: +50% Coins | Same as the Bean upgrade, you will probably get a similar amount of percentage from this one, getting to +500% eventually. |
Recipe For Profit | More coins dropped from mobs for every Anvil Recipe unlocked from the Taskmaster. Level 1: +1% Coins Level 50: +50% Coins | A massive bonus of nearly +8,000% to coin gains, a must have! |
Bubble Money | More coins dropped from mobs for every Alchemy Bubble level (only counts up to 100 levels per bubble) Level 1: +1% Coins Level 10: +10% Coins | This is probably the biggest money gain in the game after Fungi Finger Pocketer in the Lab! You can get nearly +200,000% money gains if your Bubbles are up to par! |
Vial Overtune | All Vials give higher bonuses. Level 1: +1.10x Bonuses Level 3: +1.30x Bonuses | There is only one mediocre coin gain Vial, but this is still nice as there are so many great other Vials. |
As you can see, these are the most significant sources of Coin Gain percentages in the game and the best part is that they’re not very expensive once you’ve maxed out the Major Discount upgrade.
The most important thing to remember is to start leveling as many of your Alchemy Bubbles to at least 100 so you can max out the Bubble Money upgrade.
Optimal Money Farming Equipment
This is one of the most often asked questions, what gear to choose? Thankfully, gear doesn’t make nearly as big of a difference as all the other huge bonuses in this guide so don’t worry if you don’t have everything up to par.
First off, let’s cover the two main options for legs, pants, chest, helmet and weapons. You should either use the Marbiglass set or the Godshard set from World 6. If you don’t have access to them yet, don’t worry about your gear that much and focus on progressing to World 6.
| Gear | Important Effects |
|---|---|
Marbiglass Headdress | +58 STR/AGI/WIS +12% All Stats +35% Coins from monsters |
Marbiglass Tunic | +45 STR/AGI/WIS +8% All Stats +26% Coins from monsters |
Marbiglass Legplates | +50 STR/AGI/WIS +7% All Stats +22% Coins from monsters |
Marbiglass Soles | +43 STR/AGI/WIS +7% All Stats +25% Coins from monsters |
Marbiglass Weapon | Spear: +65 STR Bow: +30 STR / +52 AGI Staff: +30 AGI / +70 WIS All: +30% Money Godshard weapons are better because they have much faster attack speed and for Bubo, you need to close attack-range of either Stingers or the Godcaster to cast Auspicious Aura! |
As you can see, the Marbiglass set is fantastic for a money farming build as it boosts the base stats for the Alchemy Bubbles and provides tons of money gain as well. Especially for Bubo, this set might work better due to the big boost to All Stats.
However, in general it is not as good as the Godshard set, because Godshard items give more Drop Rate instead.
| Gear | Important Effects |
|---|---|
Crown of the Gods | +65 STR/AGI/WIS +15% Drop Rate |
Robe of the Gods | +60 STR/AGI/WIS +30% Drop Rate |
Tatters of the Gods | +55 STR/AGI/WIS +25% Drop Rate |
Drip of the Gods | +57 STR/AGI/WIS +30% Drop Rate |
Godshard Weapon | Sword: +80 STR Bow: +37 STR / +70 AGI Staff: +40 AGI / +80 WIS All: +20% Drop Rate |
As you can see, the Godshard gear gives a massive +100% bonus to Drop Rate, which is will probably end up boosting your money gains more. However, another very useful bonus from the Godshard weapons is that they have an extremely fast attack speed which let’s you kill mobs a lot faster.
If you’re using Bubo, it might be a good idea to do a little test-farming to see which gearset gives you more money at your current stage in the game, as it varies more due to the All Stat bonuses.
Now let’s showcase the other useful gear you should utilize to boost your money gains. The table has just the important stats show underneath them and they are somewhat in priority order, last being best, but just pick the one that suits your build.
| Pendant | Chaotic Amarok Pendant +5% Drop Rate | Strung Tooth of the Divine +5% All Stats | The Divine Scarf +20% Mob Respawn Rate | Deathbloom Flower Pendant +20% Mob Respawn Rate |
| Rings | Midnight Stopwatch +3% Basic Attack Speed | Dooble Goopi +5% Money | The Emperor’s Opal +6% All Stats | Demented Emperor Opal +10% All Stats |
| Tools | Marbiglass +10% Money (Trapping & Worship +15%) | Godshard +10% Drop Rate | ||
| Trophy | Lucky Lad +7% Drop Rate | Beach Bro +50% Money | One of the Divine +42% Drop Rate | Luckier Lad +50% Drop Rate |
| Keychains | Piggy Chain Up to +10% Money | Mmm Donut Chain Up to +6% WIS | Relic Chain Up to +8% Drop Rate | Spiritlord Horn Chain +30% Money |
| Cape | Cascading Scaled Cape of Krieg +6% All Stats | Giant Violet +10% All Stats | Phoenix Wings +60% Money | Molten Cloak +30% Drop Rate |
| Premium Helmet | Ele Sorcerer Pointed Hat +5% All Stats | Ice Cream Sundae +25% Money | Goldberry +10% Drop Rate | Siege Captain Cap +10% Drop Rate |
| Premium Ring | Equinox Ring +10% All Stats | |||
| Nametag | Summer Shovel Nametag +4% All Stats | Lovely Day Nametag +200% Money | Balling Nametag +40% Drop Rate | |
| Premium Attires | Cobalt Robe +60% Drop Rate |
As you might notice, a lot of the biggest gains are behind a paywall, so don’t worry about having the best of the best gear on the table, just pick the best ones that are obtainable for you.
The biggest money gains are not obtained from equipment anyway, so lets move on to the good stuff you can get from World 1.
All World 1 Drop Rate and Money Gain Bonuses
Let’s go over the important bonuses you can equip from World 1 onwards, including Statues, Stamps and Gold Foods.
Starting off the two statues, level up Pecunia Statue for more coins and the Dragon Statue to boost the Pecunia.
| Statue | Source | Effect |
|---|---|---|
Pecunia | Crystal Custard (W4 – Crystal Mob) (Also drops from some normal mobs like Purp Mushroom, Donut and TV) | +% More Coins |
Dragon Warrior | Ancient Golem (W5 – The Hole, Room 15) | +% Statue Bonuses |
Remember to turn these statues into Onyx to double their bonuses! Check out how to do that from the World 4 Monolith NPC’s quest.
There are a few stamps that will help with our money farming build as well, so make sure to level these up:
| Stamp | Source | Effect |
|---|---|---|
 Golden Sixes |  Trash Island (W2 – Island Expedition) | +% Drop Rate |
 Crystallin | Any Crystal Monster | +% Crystal Monster Spawn Chance |
 Golden Apple | Mutton (W1 – Freefall Caverns – 4th Quest) | +% Gold Food Effect |
| Check our Quest guides for stamp sources | +STR/WIS/AGI (to boost alchemy bubble money gains explained later) |
The last row contains stat boost stamps and half of them can be unlocked through the following ways:
The Agile Stamp drops from the various World 2 Catching sources.
The Book Stamp drops from Crystal Carrots or any mining source.
The Violence Stamp drops from some World 3 mobs, mainly the W3 Crystal mob.
The Maxo Slappo Stamp and Intellectostampo drop from World 5 mobs, mainly from the Crystal mob.
The Stat Wallstreet Stamp can be bought from the Trash Island in W2 – Island Expeditions.
The Captalist Stats Stamp is dropped mainly from by the World 6 Crystal mobs.
The rest are unlocked through quests, more specifically from the various piglets in each world.

Finally, here are the Gold Foods that you should stack up on, as well as try to max them out in the World 6 Bean Stalk once you get that far.
They’re fairly slow to accumulate, but we made a Gold Food farming guide which showcases what boosts your Gold Food bonuses and the Beanstalk even further.
| Gold Food | Source | Effect |
|---|---|---|
Golden Bread | W3 & W5 Colosseum | +% More Coins |
Golden Grilled Cheese Nomwich | Any W5 Monster | +% STR/AGI/WIS/LUK |
Golden Cake |  Recipe drops from Demented Spiritlord (W6 – Troll Broodnest Miniboss) | +% Drop Rate |
The Golden Bread is definitely the toughest one to grind as it needs you to grind Colosseums, but it’s definitely worth the effort.
The Golden Cake is also a slow one to accumulate as you first need the recipe to craft them and then need a lot of resources to make a lot of them, but at least you can grind those resources with all your characters.
There are also Star Signs, which are made passive by The Rift, but you can still select three as active signs which are doubled by a Lab chip explained later in the guide, so select these Star Signs:
| Star Sign | Effect |
|---|---|
Druipi Major (Seraph Constellation) | +12% Drop Rate |
Beanbie Major (Seraph Constellation) | +20% Gold Food Bonus |
Strandissi, Agitagi, Wispommo (Hydron Constellation) | +3% STR/AGI/WIS (just pick one depending on your class) |
The effects above are just the base effects, so they will be doubled, making them more significant.


A little tidbit from World 1 is the Party Dungeon, as the Flurbo Shop has a Cash Bonus that will give +25% more coins from monsters when maxed out.
You can also get a decent All Stat & Drop Rate bonuses from Orion The Great Horned Owl which you can increase by getting more Megafeathers.
If you join a Guild, there are also two Guild Bonuses which grant useful bonuses:
| Guild Bonus | Max Effect |
|---|---|
 Coin Supercharger | +16.7% Coins from monsters for each World you’ve reached |
 Gold Charm | +20% Total Drop Rate |
Let’s move on the the World 2 bonuses, most important of which come from Alchemy.
All World 2 Bonuses for Money Farming
Some of the biggest money gains come from World 2 Alchemy (same as most other aspects of the game as well),
These bubbles are also the reason why gaining a lot of All Stat % is important, so you get more STR and WIS for your DK and Bubo for the money gain bubbles.
Here are the important Alchemy aspects you should focus on:
| Bonus | Resource | Effect |
|---|---|---|
| More STR/AGI/WIS for all players | ||
| All passive bubbles (small bubbles) give higher bonuses to Warriors/Archers/Mages | ||
| +% More Coins from monsters for every 250 STR/AGI/WIS (you get all 3 bubbles bonuses for every class) | ||
| First bubbles give higher bonuses | ||
| +% Gold Food Bonuses | ||
| More Base STR/AGI/WIS per 100 items found in the W5 Slab | ||
| +% STR/AGI/WIS for every 2,000 Tome Points | ||
| +% Drop Rate | ||
| Higher Minor Link bonuses from W5 Divinity Gods (explained later in the guide) Make sure to have this one active on your money farmer! |
While the bubbles are the biggest difference makers in the money farming build, there are also two useful Vials you should max out.
| Vial | Resource | Effect |
|---|---|---|
Dieter Drink | Bored Bean (W1 – Valley of the Beans) | +% More Coins from monsters |
Pearler Shell | Clammie (W4 – Shelled Shores) | +% All Stats |
You can boost these vials even further through the Vial Master from the Rift and Vial Overtune from the Upgrade Vault as well as the Chemistry Set bonus in the Lab.
Finally, Alchemy also has Sigils to level up in the Pay2Win tab, which can provide nice bonuses for this build:
| Sigil | Max Bonus (Red Sigil) |
|---|---|
| +40 Base STR | |
| +40 Base AGI | |
| +40 Base WIS | |
| +30% Drop Rate | |
| +40% Gold Food Bonuses |
These bonuses can be multiplied 5x by getting the Chilled Yarn artifact to Sovereign level, explained in the World 5 section of this guide!
Moving away from Alchemy, there are other bonuses to enjoy in World 2, especially the Post Office. We listed the important boxes below, but if you can’t max out all of them, check the reason-column to figure out which one to max out first.
Check our Cranium Cooking guide to see a few important boxes to lower talent cooldowns, which are not important for money farming but useful when farming with Bubo.
| Post Office Box | Effect | Reason |
|---|---|---|
Locally Sourced Organs (Tab 1, Box #2) | More Base Max HP +% Max HP +% Faster Respawns | The important stat here is the faster respawning of mobs (+18% at max level), the others don’t matter, so this is not the most important box. |
Non Predatory Loot Box (Tab 1, Box #12) | +% Drop Rate More LUK +% Crystal Mob Spawn Chance | This is the most important box as it increases drop rate AND crystal mob spawn chance. Max this out before any other box! |
Utilitarian Capsule (Tab 2, Box #2) | +% Printer Sample Size +% Multikill per Tier +% Cash from Mobs | This is the second most important box due to the increased coin gains, so max this out second. Sadly the cash bonus is only +23% when maxed out. |
Myriad Crate (Tab 2, Box #9) | More Base STR/AGI/WIS More Base Skill Efficiency +% All Skill EXP | This is a good box to put all leftover points in to boost your base stats for the alchemy bubbles, but it scales very slowly and requires tons of points so max this out last. |
Scurvy C’arr’ate (Tab 2, Box #10) | +% AFK gains for Sailing More AGI +% Total Damage | This box is probably the least important, but gives some AGI to boost the green coin gain bubble. Still a little better than Myriad Crate as it boosts Sailing progress and gives Total Damage if needed. |
Box of Gosh (Tab 2, Box #11) | +% Divinity EXP More WIS +% Divinity EXP | Gives more WIS so helps with the coin bubble for Bubo farming, not a huge boost but better than the previous 2 crates. |
Gaming Lootcrate (Tab 2, Box #12) | +% AFK gains for Gaming More STR +% Total Damage | Gives more STR so helps with the coin bubble for DK farming. Also Total Damage boost is always a plus. |
Next up lets go over the Arcade bonuses you can unlock to boost your money gains and drop rate. Check out our Arcade guide for more information.
Remember that you can double the max bonuses by upgrading them once they’re maxed out.
| Arcade Upgrade | Max Effect |
|---|---|
| +10% More Coins | |
| +15% More Coins | |
| +100 Base STR | |
| +100 Base AGI | |
| +100 Base WIS | |
| +15% Drop Rate |
Next lets cover the Obol setup that you should use to max out your drop rate and a little coin gains on top.
The example doesn’t have Red Obols as they can only be acquired from the Gem Shop, but use common sense to replace any Obols if they give more Drop Rate than you current obols. Prioritize the obols for you Family tab first, then the same ones for the Personal tab.
The table below shows an example of a money farming obol setup for the Personal tab, but use the same logic for the Family Tab as well.
 |  | | ||
 | | |||
| | |||
|  | | ||
|
| | |||
| | |||
| | |
Next up a tiny Base Stat bonus from the Island Expeditions at the Deepwater Docks map, and from there the Shimmer Island.
You do get important stamps and Star Talents from the other islands as well, but since they’re already covered in other sections of this guide, let’s just mention that you can buy more Base STR/AGI/WIS bonuses with your Shimmer points.

You can also get a global Coin gain bonus from Poppy The Kangaroo Mouse at The Oasis map. You can unlock the map by buying the Treasure Map from the World 2 Town Shop and following its instructions.
Finally we’ve covered all the important money and drop rate bonuses from World 2 and it’s time to go over the biggest boosts from World 3, which mainly come from Prayers.
Every Money Gain Bonus from World 3
Frostbite Tundra is a simple world when it comes to money farming as the only interesting aspects are Prayers and Equinox.
However, these prayers require tons of damage to be viable, so you must consider if you should use them depending on your damage.
| Prayer | Source | Effect |
|---|---|---|
 Midas Minded |  Wakawaka War Beat Wave 70 (W2 – Up Up Down Down) | Level 1: +20% Drop Rate +250% Monster HP Level 50: +118% Drop Rate +1,475% Drop Rate |
 Jawbreaker | Wakawaka War Beat Wave 101 (W2 – Up Up Down Down) | Level 1: +40% More Coins +200% Monster HP Level 50: +236% More Coins +1,180% Monster HP |
As you can see these prayers provide massive gains to both Drop Rate and money % but they buff enemies HP by a huge margin.
This is why it is important for you to make sure you can still one-tap every enemy with these prayers active.
Especially with Bubo, you must make sure that the gas still kills the enemy on the first tick of damage. If it doesn’t, you should unequip one or both of the prayers until you have enough damage.
Moving on to the Equinox, there are two useful bonuses for the money farming build.
| Cloud | Effect | Reason |
|---|---|---|
 Faux Jewels (#9) | +% Drop Rate | This is a massive bonus as it can reach over +100% Drop Rate when maxed out! |
 Equinox Symbols (#11) | +1 to all Talent Levels (per level of this cloud) | This is not a significant bonus, but when maxed, will add +21 to every single Talent so it definitely adds up. |
All the other bonuses from other worlds are more significant, so only use these if your damage is up to par. If you’re not powerful enough yet, don’t worry about these and move on to the World 4 bonuses below.
Every important money bonus from World 4
World 4 is arguably the biggest difference maker when it comes to farming coins due to the insane Lab bonuses.
The chips will double your Crystal Cards and the bonuses will multiply your coin gains by a thousandfold.
Let’s start out with the Chips because they’re easier to explain and you only have 3 main ones to worry about, the rest are just to boost your stats from gear and star signs.
You can only equip one of each of these chips on a single character.
| Chip | Effect | Reason |
|---|---|---|
Chocolatey Chip | 75% chance to spawn a crystal mob when one dies | This is by far the most important chip as it will boost the Crystal Mob spawn rate by an insane amount and they are the main source for huge money gains. |
Omega Nanochip | Doubles bonus of card equipped in top left slot | This doubles one of your crystal spawn chance cards, increasing the chance to spawn Crystal Mobs even further. Must have! |
Omega Motherboard | Doubles bonus of card equipped in bottom right slot | Same as above, a must have! |
Silkrode Nanochip | Doubles the bonuses of all active Star Signs | You will have all Star Signs enabled from the Rift, but you can still select 3 Star Signs as actives which will still be doubled by this. |
Silkrode Motherboard | Doubles MISC bonuses of currently equipped Trophy | This can be a very effective chip if you have a good Trophy equipped. |
Silkrode Software | Doubles MISC bonuses of keychain equipped in the upper keychain slot | Also decent if you have a good keychain. |
Silkrode Processor | Doubles MISC bonuses of currently equipped Pendant | Same as above, a big boost if you have a good pendant. |
Potato Chip | +20% Basic Attack Speed | This is a nice one to have as you will be active fighting at all times, so this will speed up your attacks. Only use this if you don’t have all of the other ones, as you can only have 7 active chips. |
The main problem with chips is that you need to wait a full week for a new rotation to craft them for free and you might have to wait a very long time to get all the three chips, so your only option might be to use the Gem Shop to buy more.
However, these chips are so crucial that it is worth spending some gems to get them.
Next, let’s check out the important main nodes within the Lab.
| Node | Effect | Reason |
|---|---|---|
 Certified Stamp Book | All Stamps (except MISC tab stamps) give double bonuses | There are many useful stamps covered earlier in the guide and most of them are in the Combat tab, so this is an amazing bonus! |
 Spelunker Obol | 1.5x higher effects from all active Lab Jewels | Self explanatory, boosts your jewels bonuses. |
 Fungi Finger Pocketer | +2% Coins from monsters for every 1 million Green Mushroom kills (across all characters) | This is the biggest money gain bonus in the entire game. Make sure to farm tons of Green Mushroom kills! |
 My 1st Chemistry Set | All bonuses from Alchemy Vials are doubled | Not a huge bonus for money farming as there are only two useful Vials for this, but amazing overall. |
 Depot Studies PhD | All bonuses from the World 6 Farming Crop Depot are 1.3x higher | This node must be bought from the W6 Jade Emporium. The Crop Depot will give a huge money gain % bonus based on how many crops you have found, so this multiplier will be significant. |
Finishing off the Lab, let’s go over the important Jewels that you should connect. These have the same problem as the chips, as you can only unlock one per week for free, so you should spend some gems to unlock the crucial ones from the Gem Shop.
| Jewel | Effect | Reason |
|---|---|---|
 Sapphire Navette | +3% STR/AGI/WIS/LUK | Useful to boost the alchemy bubbles effects, but not a significant buff. |
 Emerald Rhombol | The Fungi Finger Pocketer node gives an additional +1% bonus per million Green Mushroom Kills | This is the most important Jewel, gives a massive coin multiplier once you have tons of mushroom kills. |
 Black Diamond Rhinestone | All meal bonuses are 1.16x higher | A decent money bonus as meals give big money gains and this increases them. |
 Pure Opal Navette | +10% higher effects from all active nodes and jewels from the Lab | A great Jewel as it affects every bonus from the Lab (except Spelunker Obol) Must be purchased from W6 Jade Emporium! |
 Pure Opal Rhombol | The Depot Studies PhD node gives an additional 10% boost to all Crop Depot bonuses | Also a great Jewel as the Crop Depot bonus for cash gains is huge. |
While the Lab bonuses are absolutely massive for money and drop rate gains, we’re not nearly done with World 4. Let’s continue to the Meal upgrades. Make sure to check out our Ribbon guide to boost these bonuses!
| Meal | Effect |
|---|---|
Salad (#3) | +% Cash from Monsters |
Cauliflower (#29) | +% Basic Attack Speed (Great for active fighting) |
Bunt Cake (#32) | +% Cash from Monsters |
Yumi Peachring (#65) | +% Golden Food Bonuses |
These bonuses end up massive, so make sure to level up anything that boosts meal bonuses, including the Shiny Pets mentioned below.
| Shiny Pet | Effect |
|---|---|
Red Mushroom | +% Bonuses from all meals |
Slime | +% Drop Rate |
Sheepie | +% Bonuses from all meals |
Xylobone | +% Drop Rate |
Choccie | +% Drop Rate |
There are also tons of shiny pets that boost STR/AGI/WIS but those gains are so low that they don’t deserve their own row in the table.

Other than the Shiny Pets, Breeding also has a great addition called The Arena which gives amazing bonuses depending on the highest round you reach in it, up to round 200.
The important bonuses you need from here are 1.5x Money Gain from Round 20 and another 2x Money Gain multiplier from Round 175, so make sure to grind those out!
Beast Master has a great Talent called Arena Spirit which provides free retries to the Arena for a few minutes and boosts your pets damage as well!

There’s also a tiny +5% Coin Gain bonus to be found from the World 4 Achievements, called Zero G Scorin’ which requires you to get a score of 10M from the World 4 Colosseum, which should be pretty easy if your damage is up to par.

To finish off World 4, there’s the newest addition, The Tome.
The Tome has absolutely massive bonuses to STR/AGI/WIS as well as Drop Rate, but there’s not much to say about it, other than make sure to get as many points as possible to increase these bonuses. The Drop Rate can get as high as over +100% so it’s definitely worth grinding.
Now let’s move on to World 5, bringing in important money farming gains from various Divinities and Sailing artifacts.
All World 5 Money Gain and Drop Rate Bonuses
Smolderin’ Plateau aka World 5 brings along most notably Sailing, which provide huge boosts to Drop Rate and Money Gains, but also Divinity, which has a small money gain boost.
Also The Hole can provide significant bonuses to various aspects of this build.
Let’s start off with Divinity as there is only one God you need to worry about.
| God | Minor Link Bonus |
|---|---|
 Harriep | +100% more coins for all characters |
Make sure to have your money farming character connected to Harriep even if you have the Doot pet, as some people debate whether the bonus activates properly otherwise.

Also make sure to select the Big P alchemy bubble on this character to boost Harrieps Minor Link Bonus even higher!
Moving on to Sailing Artifacts, there’s a lot of huge gains to be had. Make sure to check out our complete Sailing guide for more information.
The table below shows the base artifacts bonus, which can be multiplied many times by getting the upgraded versions of the artifact all the way to Sovereign Artifacts!
| Artifact | Source | Effect |
|---|---|---|
Maneki Cat | Safari Island (#1) | +2% coins from mobs per level of your highest leveled character |
Chilled Yarn | Snowy South (#6) | All Alchemy Sigils give 2x bonuses |
Socrates | Isle of Note (#14) | +10% STR/AGI/WIS |
The Onyx Lantern | The Edge (#15) | Onyx Statues now give 2.3x bonuses, instead of 2x |
The Shim Lantern | The Edge (#15) | Shimmer Island bonuses from World 2 give 2x their bonus |
The Winz Lantern | The Edge (#15) | All Winner Bonuses from Summoning give1.25x their bonus |
As you can see, these bonuses are absolutely massive when maxed out to Sovereign levels (and even before that).
Finally let’s move on to The Hole, which has tons of mechanics and bonuses to level up and it can get quite complicated to explain so let’s try to keep it as simple as possible.
| Upgrade | Effect | Reasoning |
|---|---|---|
Gloomie Lootie (Engineer Schematic #44) | +5% Drop Rate for each Colony of Gloomie Mushrooms defeated | Self explanatory, easy to get to around +50% Drop Rate and more if you have time to grind more colonies. |
Gloomie Mulch (Engineer Schematic #49) | All mobs spawn +10% faster | A nice little bonus for active fighting. |
 Sanctum of LOOT (Engineer Schematic #81) | +20% Drop Rate for each Sanctum of Ancient Golems cleared | A big boost to Drop Rate, fairly fast to get to +400% Drop Rate and higher. |
Monumental Vibes (Hole Majik) | All Monument Bonuses are up to 2x higher | The Monument of Wisdom provides a Drop Rate boost so this will boost that higher. |
Lengthmeister (Village Majik) | All Measurement Bonuses are up to 2x higher | This is useful because the 16th Measurement Upgrade gives more Drop Rate. |
Pocket Divinity (Idleon Majik) | If you have the King Doot Companion, this will give a +15% All Stat boost | A significant boost to STR/AGI/WIS to boost the Alchemy Bubbles |
Measure Bonus #16 | +% Drop Rate | Gives a big boost to Drop Rate that is further boosted by killing Ancient Golems and by the Village Majik mentioned above. |
 Monument of Wisdom (Room #13) | Has a Reward Chest that boosts Drop Rate | Self explanatory bonus, level 100 bonus is around +55% Drop Rate. Can be boosted by the Hole Majik mentioned above. |
The Gambit (Room #14) | 8th Upgrade gives a Coin Drop multiplier depending on how many Gambit Points you have | At around 1.5M Gambit Points the multiplier is 1.6x More Coins, which is huge! |
These bonuses are quite significant, but can take a long time to acquire as progressing in the Hole is very slow. Just keep grinding it in the background and you will eventually get all these awesome gains.

That’s all you need to look into when it comes to World 5, other than of course trying to max out your item Slab in order to boost the various alchemy bonuses that depend on it.
Let’s move on to World 6 for some amazing Farming and Gold Food bonuses!
World 6 Drop Rate and Coin Gain Bonuses
The biggest money makers in World 6 are Farming and The Beanstalk which you unlock from Jade Emporium. However, Summoning also provides notable boosts to Drop Rate and All Stats.
Let’s start with the Jade Emporium, as it requires necessary upgrades to get money and drop rate gains from Farming.
| Upgrade | Description |
|---|---|
 Crop Depot Scientist (#4) | Adds the Crop Depot next to the Farm. This upgrade is required to gain any bonuses! |
 Gold Food Beanstalk (#8) | Adds the Giant Beanstalk behind the Sneaking building. Allows you to drop a stack of 10,000 Gold Food on it to permanently gain its bonus for all characters. You can still equip more of those foods on your character for even more bonuses! |
 Science Environmentally Sourced Pencil (#18) | Adds new bonus to the Crop Depot: +15% Cash from Mobs per crop found |
 Supersized Gold Beanstacking (#22) | Allows you to drop a stack of 100,000 Gold Food on the Beanstalk to gain its bonus. You must first drop the 10K Gold Food! |
The Crop Matrix (#26) | Unlocks the Depot Studies PhD node in the Lab, which boosts Crop Depot bonuses. |
Sovereign Artifacts (#29) | Unlocks Sovereign Artifacts in Sailing, which increase the already great money and coin gain bonuses from Sailing! |
Brighter Lighthouse Bulb (#31) | Unlocks the three new Lantern Artifacts for Sailing, which are very good for money gains. |
 Laboratory Bling (#32) | Adds the three Pure Opal Jewels to Lab, which are all useful for this build. |
 Science Highlighter (#39) | Adds new bonus to the Crop Depot: +1% Drop Rate per Crop found after 100 So 110 found unique crops would give +10% Drop Rate |
As you can see, these Jade Emporium Upgrades are crucial for the Crop Depots best boosts. These important bonuses are +% Coins from mobs and +% Drop Rate which can scale to huge numbers if you have everything setup in the Lab and found a lot of crops!
As for the Beanstalk, just check the Gold Food section earlier in the guide to know which Gold Foods you should focus on grinding so you can get those boosts.
Finally, there’s the Summoner’s Table which requires you to beat Summoning Battles to slowly unlock various bonuses.
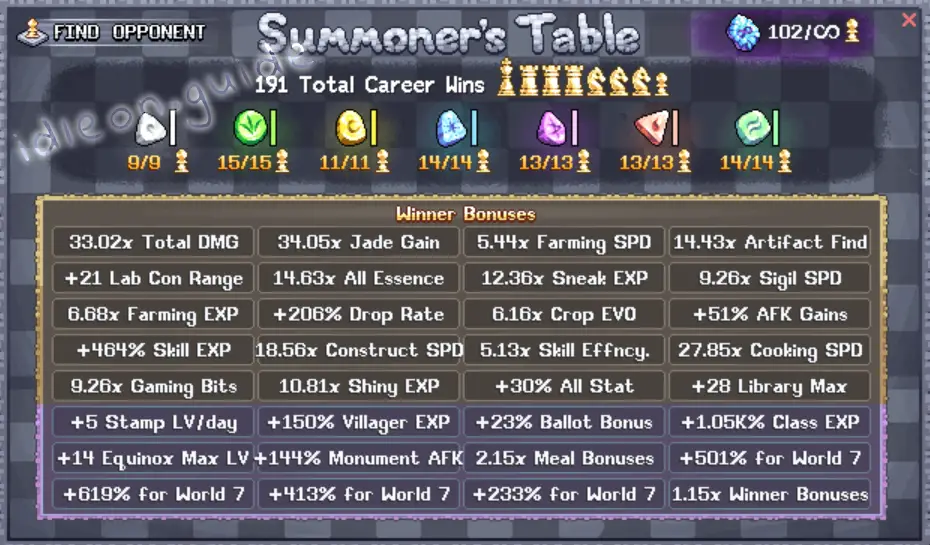
While most of those bonuses are not important for our build, there is one that boosts Drop Rate and another that boosts All Stat %.
After approximately 100 victories, you will get +200% Drop Rate and +30% All Stats which are very significant bonuses, but will take a lot of Summoning progress to get that far.
You can also purchase the third upgrade from the World 6 Merit Shop to boost those Winner Bonuses.
Finally there’s Sneaking, which doesn’t have anything crucial normally, but there are Pristine Charms. They are ultra-rare drops you can get from Sneaking, but the main way to get them is through the Gem Shop.
The problem is, they cost 920 gems a pop and you get a random one from all the 23 available ones (thankfully can’t get duplicates), so unless you have tons of extra gems to spend, this is probably not the place you want be spending them.
However, if you can afford it, here are the Pristine Charms you should look out for:
| Pristine Charm | Effect |
|---|---|
Cotton Candy | +1.15x Drop Rate |
Gumball Necklace | +1.40x Coin Gain |
Crystal Comb | 1.30x Summoning Winner Bonuses |
Surgar Bomb / Fruit Rolle / Lollipop Law | +20% STR/AGI/WIS |
Gumm Stick | +50% Gold Food Bonuses |
Liqorice Rolle | 1.25x Bigger Bonuses from Non-Misc Stamps |
As you might notice, some of them are quite significant, but you will do just fine without them if you can’t afford to buy them out or just prefer to hope for the best and get them as normal drops from Sneaking.